Learn How to Boost Texture and Movement with Mandy McCullough

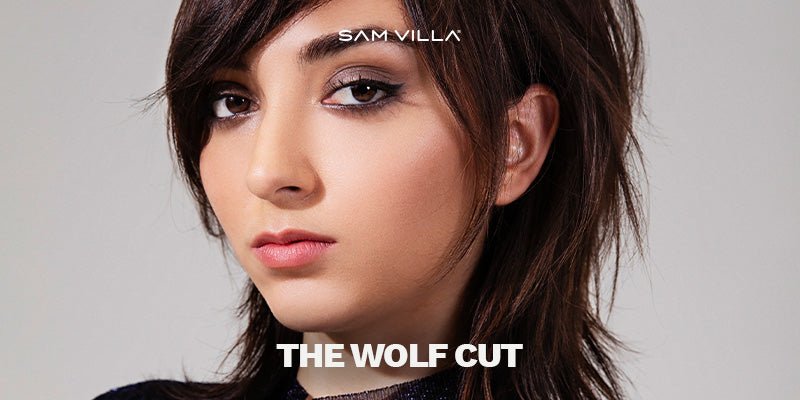
Do you ever have long-haired guests who ask for “something new” but don’t want to give up any of their length? This long layered haircut with soft face-framing pieces just might be the answer!
Haircuts that are short in the front and long in the back are hot right now, according to Sam Villa Ambassador, Redken Artist and Fix Salon Owner Mandy McCullough. Mandy is a passionate educator whose mission is to inspire stylists in an inclusive way and help career-minded hairdressers live their best lives through education and mentoring.
She teaches an intentional, repeatable method for creating a shag-inspired layered cut without sacrificing length in the back. Read on to master this oft-requested hairstyle!
Prepping for the Long Layered Haircut
A great haircut always starts with a thorough consultation! As you discuss what your guest wants, ask them where they would like the shortest pieces to fall around their face. Mandy recommends starting the face frame between the cheekbone and the jawline.
Prep wet hair with Redken One United and split it down the midline. Then create a horizontal line from the high point of the head to the ears on each side.
Divide each of these four quadrants into vertical sections or “bevels”. These narrow sections follow the round shape of the head, which means a rounder and softer perimeter for the haircut! Secure all sections with Signature Series Clips.
Creating Guides for the Long Layered Haircut

Separate a very small piece of hair next to your guest’s face and cut it to the desired length with your Signature Series Wet Cutting Shears at a slight downward angle away from the face. This will serve as your guide for the shortest point of the haircut.
Next, separate a very small piece of hair from the center back. Cut this piece to your guest’s desired perimeter length. This will serve as your guide for the longest point of the haircut.

As you cut the long layered haircut, you’ll connect the dots from short to long. Visualize the diagonal line you want to create. You’ll use a series of “mini guides” to structure this line.
Working on the section behind the face-framing section, separate a very small piece of hair from the area nearest the face. Cut this section to about the length of the base of the neck, keeping in mind your desired diagonal.
Continue working through the remaining sections from front to back, cutting guides from the front of each section. These guides will form the “blueprint” for the long layered haircut. Repeat on the other side.
Cutting the Perimeter
Step #1: Starting on one side of the head, separate a diagonal back triangle section from the top of the parietal ridge into the back of the crown and secure it out of the way with a Signature Series Clip. This will help to even out the density through the perimeter, since the area behind the ear is higher-density than the area in front of the ear.

Step #2: Find your face-framing guide piece and the guide piece from the section behind it. Connect these two dots with the Signature Series Razor, using small up-and-down strokes and cutting from short to long away from the face. Hold the razor perpendicular to the hair to create textured edges with weight.
Step #3: Repeat Step #2 with the rest of the sections, working in sections from the face-frame back towards the perimeter.
Step #4: Release the hair in the triangle-shaped section from the clip. Add it to the hair below and comb the sections together. Using the under layers of hair as a guide, trim any overhanging hairs.
Step #5: Repeat Steps #1-4 on the opposite side of the head. Match the lengths of the guide pieces to the guide pieces on the other side for a balanced shape.
Cutting the Long Layers
After cutting the perimeter, Mandy suggests blow drying the hair with Redken Big Blowout and finishing the haircut with dry cutting techniques. This delivers added control and helps you visualize the final shape.
Step #1: Part the hair down the midline and clip one side out of the way. Working on the other side, create a horizontal parting from the high point of the head down to the ear. Secure the hair in front of this parting with a clip.
Step #2: Divide the loose quadrant of hair into two narrow vertical bevels. Secure the bevel nearest to the face with a clip.

Step #3: Take the center back section and elevate it vertically. Over-direct the section all the way forward so that it wraps around the head shape. This will create a beautiful round silhouette when you release the section.
Step #4: Point cut into the ends with the blades of your Signature Series Dry Cutting Shears at a 45° angle to the hair shaft. Release the hair and comb it back into place.
Step #5: Repeat Steps #3-4 with the rest of the hair, working from back to front in narrow vertical bevels. Bring each bevel around the head shape so that you’re continuing the direction of that section.
Removing Weight and Bulk
When removing excess weight from long hair, it’s important to focus on adding movement to the hair. Extracting weight from just the ends will create blended texture, but the hair will remain heavy. These techniques allow you to reach into the mid-shafts of long hair to de-bulk and create soft, natural movement and lightness.
Removing Weight in Thick, Coarse High-Density Hair
Step #1: Separate a section of hair from the back of the crown area and elevate it vertically.
Step #2: Place the Artist Series Slide Cutting Shears into the mid-shafts with the blades pointed up. Mandy recommends the Artist Series Slide Cutting Shears for weight removal because the curved blades push the hair out as you cut, creating softer edges with lots of natural movement.
Step #3: Open and close the blades as you “talk” your way up the hair shaft from mid-strands to ends. Place the blades into the middle of the section and “talk” the shear through to the ends, then repeat on the other side of the section.
Step #4: Repeat Steps #1-3 with the rest of the hair in the crown. Continue until your desired weight removal is achieved.
Removing Weight in Fine, High-Density Hair
Step #1: Separate a section of hair from the back of the crown area and elevate it vertically.

Step #2: Place the tips of your Signature Series Dry Cutting Shears into the hair between the ends and mid-shafts. The shears should be perpendicular to the hair shaft. Close the shears while sliding them down towards the roots in a gentle back-combing motion. Continue this movement as you work your way through the section, leaving some pieces intact.
Step #3: Use the wide teeth of your comb to detangle the section and remove the cut hairs. Admire the perfectly blended, invisible layers!
Step #4: Repeat Steps #1-3 with the rest of the hair in the crown. Continue until your desired weight removal is achieved.
Detailing the Face Frame
Step #1: Working on one side of the face frame, pick up the section next to the face and over-direct it across the forehead to the opposite side.

Step #2: Place the 14 Tooth Point Cutting Shears into the section with the teeth on top of the hair. Open and close the shears while pushing them up the hair shaft in a “teasing” or back-combing motion. Continue this movement as you work your way through the section.
When texturizing the face frame a little goes a long way-- it’s important to maintain strength through the ends! Three to four pushes should be sufficient for most hair types.
Step #3: Use the wide teeth of your comb to detangle the section and remove the cut hairs. The hair should start opening up and flowing away from the face.
Step #4: Repeat Steps #1-3 on the other side of the face.
Step #5: Separate the face-framing pieces behind the front section and over-direct the hair forward.

Step #6: Place the 14 Tooth Point Cutting Shears into the section with the teeth on top of the hair. Repeat the back-combing motion while closing the shears and pushing them up the hair shaft two times.
Step #7: As before, use the wide teeth of your comb to detangle the section and remove the cut hairs.
Step #8: Repeat Steps #5-7 on the opposite side of the head.
Cultivating Softness With Strength
Long layered haircuts with soft face-framing pieces are some of the most popular styles our guests ask for in the salon. This soft silhouette is perfect for long-haired guests who want to stay on trend with a flowing short-to-long style. It’s a great haircut to have in your arsenal to grow your business and create custom solutions for your clients!
Grab your shears and mannequin head and try out this beautiful hairstyle today! For more free education to level-up your skill set, follow Mandy @fancyfinish and Sam Villa @samvillahair on Instagram.