


Strong fringe has been trending for quite some time. You may already have had guests coming in requesting a very short fringe as seen on the runways or in fashion mags.
One of the challenges we face is that our guest may not have the ideal face shape to wear the short fringe they request and the other challenge we face is our guest may not have the ideal density or texture of hair to support the look.
We are all aware that an oval face shape is ideal for most any cut. But with these short fringes you need to take profile into consideration and be honest in your consultation. If they do not have the profile or the density and texture and if they are hell bent on a short fringe, you will need to explain why you will need to adjust the length to meet the needs of the shape of their face. You both win, as you know the end result will be visually pleasing. Yes, this is Value! YOU are in control as you are there to act upon their request for a fringe that is trendy and results in a statement look!
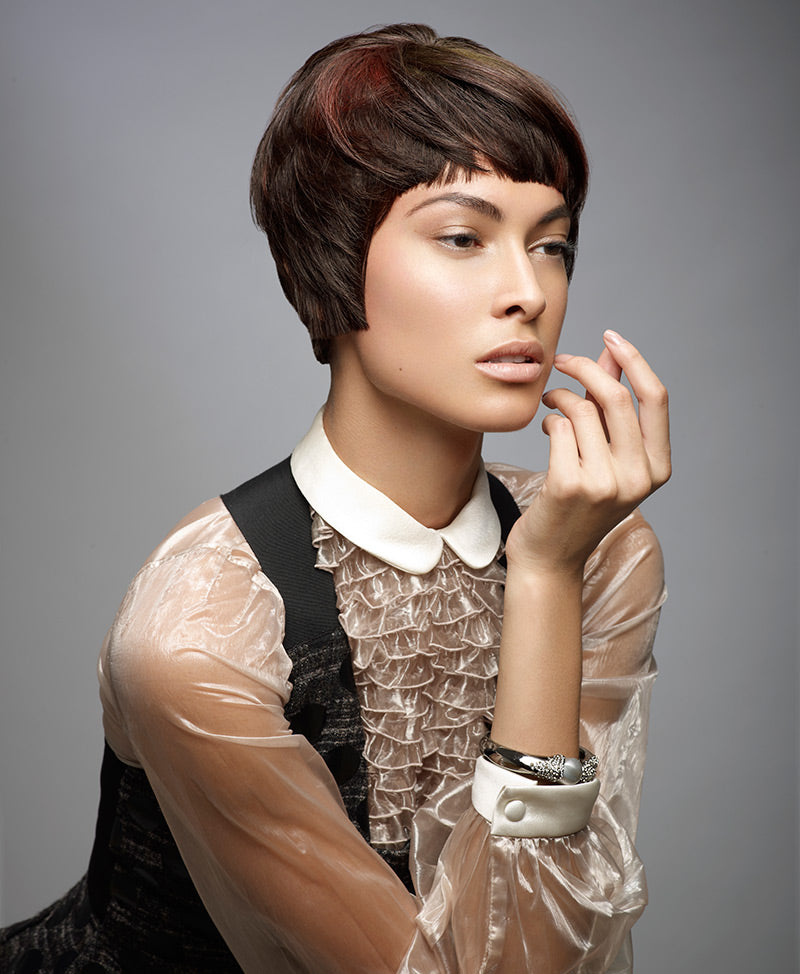
The clip you are about to view will take you through the techniques to create a vandalized, highly textured short fringe on a model who happens to have very dense hair along with a very low front hairline. Our model also has very dark hair. And darker hair will not lend itself much light reflection unless you are brave enough to really get in there and take some pieces away. Styling product will also play an important role in the finish to result in visible movement and texture.
Tools For Success
 Sam Villa Signature Series 5.75 Wet Cutting Shear.
 Sam Villa Signature Series InvisiBlend Shear.
 Sam Villa Signature Series Long Cutting Comb.
Products For Success
- Redken Diamond Oil High Shine Airy Mist.
- Redken Mess Around 10 Disrupting Cream-Paste.
Since we are going to be cutting the fringe on dry hair you are probably wondering why we have not listing the Professional 7" Dry Cutting Shear. We need some slip while on this models fringe and because the 7 Shear holds on to the hair perfectly in the blades the 5.75 Shear is a better choice.
PERIMETER THE FOCAL POINT
NOTE: Do not be intimidated to take the fringe short if the facial shape and profile allow or you miss the opportunity to make The Statement!
- Lightly press down on the hair about two inches above the perimeter and begin to point cut in an upward position into the perimeter (from below the edge) free hand with your shear either on a diagonal or straight or both.
- Be sure to use your mirror to check for balance.
- Continue across the entire perimeter following the shape of the forehead.
HOT TIP: Depending on facial shape you can create a curved or tilted (a great word to use in place of asymmetrical) line for the perimeter.
- Once you are pleased with the perimeter line, stop! Continuing to cut into the perimeter will only make the edge look textured. Now take a look at the silhouette to determine the interior texture you want to create for movement.
CREATING THE SURFACE TEXTURE
- Pick up the InvisiBlend Shear Why this Shear?
- The straight blade on this superior blending shear is smooth and blunt it does not have a sharp edge and will not cut into the hair.
- The blade with the teeth pushes the hair down across the smooth, blunt blade and creates little arcs resulting in very soft invisible blended lines.
- This shear is excellent for working on any focal point in a hair cut especially on fringes.
- Come into the top of the fringe with the smooth, blunt blade approximately two inches above the perimeter edge at a slight diagonal with open blades.
- Close the blades and slide the shear out of the hair you will experience zero no snagging as the hair is floating along the smooth, blunt blade.
- Continue through the surface until you feel you have removed enough weight.
EVEN MORE SURFACE TEXTURE VANDALIZE
- Pick up the 5.75 shear for the pinch and talk technique.
- Pick up small sections of the fringe and pinch with your thumb and forefinger.
- Slightly open the blades and talk the shear down the pinched section by opening and closing as you work your way down each section this technique creates peaks and valleys within the surface resulting in added visible texture.
NOTE: As stated earlier, dark hair does not show a lot of texture you need to be willing to be a little aggressive and not be afraid to get in there and remove pieces to achieve the statement look!
- Once you have the removed the desired amount of hair and can see the texture you just created you can go back in to the perimeter free hand to break up the edge a bit more if necessary for the desired end result.
- Be sure to balance out the corners of the fringe you can go back in with the InvisiBlend shear to remove more weight in the corners.
THE SHAPE COMES ALIVE!
Finish the fringe with Redkens Diamond Oil High Shine Airy Mist and Mess Around 10 Disrupting Cream-Paste.
- Diamond Oil High Shine Airy Mist is very light and perfect for fringes as it will not weigh the hair down.
- Lightly spray across the fringe you will immediately notice the light reflection that will show off the texture.
- Mess Around 10 Disrupting Cream-Paste will complete the look with a medium hold, a little more shine and add separation.
- Place a small amount into your palm and work into fingertips.
- Go in and pinch through the edge of the perimeter.
Keep in mind:
- You need to go shorter for this trendy look to make a statement!
- If working with thick, coarse hair texture, be aggressive with your texturizing!
Get your perimeter in first and then go into the upper surface and pinch and talk to remove some really strong pieces let go and just cut the darn thing!

