The shag cut is one of today’s hottest trending hairstyles. When it comes to creating this heavily-requested haircut, it’s important to be intentional with the tool you select (razor or shear?) and where you begin the haircut.
Doing things differently can deliver better results with your shags and textured cuts, according to Sam Villa Ambassador and Redken Exchange Facilitator Becka Bradshaw.
Becka is incredibly passionate about hair design, barbering and finishing. She creates real-life hair magic at her Shear Art salon in South Tampa, Florida. Discover her fresh techniques to upgrade your shags!
Choosing Your Tool
Razors, cutting shears and blending shears can all be used to create beautiful texture-- so how do you select the right tool for the job? It helps to consider the functions of each tool and how they affect the hair shaft.
A razor will leave the hair cuticle slightly beveled, so it’s a great option for high-texture cuts in thick or heavy hair. (Think movement, movement and more movement!) Cutting shears, by contrast, create blunt ends on each individual strand.
This means that for your guests with fine and/or blonde hair, using a shear instead of a razor helps prevent over-texturizing and maintain density. Shears may also be a good option in regions with high humidity, or for our guests who are concerned about flyaways and frizz.
With the proper techniques, it is possible to achieve a “razored” effect with a shear. Read on to learn how Becka does it!
Cutting the Curtain Fringe

While we often start cutting at the perimeter, why not switch things up and start by creating the fringe? Try this structured texturizing technique for a soft, swishy fringe with lots of natural movement.
Step #1: Begin by sectioning off the hair that will form the fringe (from the recession area on one side to the recession area on the other side). Take this section back a little deeper than you usually would for bangs, so that the point of the triangle-shaped section is almost at the crown of the head. Secure the rest of the hair out of the way with Dry Sectioning Clips.
Step #2: Divide the fringe hair into two sections along the midline and identify where your guest wants the curtain fringe to fall. Pick up a small guide piece of hair from the center of the fringe, elevate it slightly, and cut it to the desired length with your Artist Series Shear. Use a soft open-and-close motion with the shear blades as you gently push the shears up towards the scalp. Becka calls this technique “back cutting” since the movement is similar to back combing!
Step #3: Add small pieces of hair on either side of the guide, elevate the new hair and the guide piece slightly, and repeat the back cutting process.
Step #4: Elevate one side of the fringe to a 45 degree angle and over-direct to the center, leaving the guide piece loose. Place your fingers into the hair at 45 degrees, so that the angle is shorter towards the top of the head and longer at the bottom. Pick up the guide, add it to this section, and point cut into the hair, working from the top of the section down.
Step #5: Repeat Step #4 on the other side of the fringe.
Step #6: Elevate one side of the fringe to a 45 degree angle and over-direct to the center. A good rule of thumb is to texturize hair in the same elevation that was used to cut the hair.
Place the cutting blade of your Reversible Blenders underneath a small piece of hair at the top of the section. With the shears perpendicular to the hair shaft, “chew” through the hair with a light open-and-close motion, then push the hair off to the side.
Repeat this process, working with small pieces of hair from top to bottom, until the entire section has been texturized.
Step #7: Repeat Step #6 on the other side of the fringe. How much texture is enough? When you can finger-style the hair into place and it holds the shape, you’re good to go!
Cutting the Face Frame

Working with detached sections is a great way to bring out TONS of natural volume and texture without losing the perimeter. Remember-- your layers need to blend, but they don’t necessarily need to connect to the perimeter! Follow these steps for a stunning shaggy face frame.
Step #1: Section off the hair from the top of the ear to the recession/fringe area on each side. Secure the hair behind the ears out of the way with Dry Sectioning Clips.
Step #2: Working on one side of the head, pick up a small horizontal subsection of hair from the top of the section. Elevate the hair at a 45 degree angle and pick up a small piece of hair from the fringe to use as a guide. Place your fingers into the hair and slide them out to just past the end of the guide.
Step #3: Place your Artist Series Shear almost parallel to the hair shaft with the blades pointing toward the tips of the hair. Then “out cut” the hair by opening and closing the shear as you slide your fingers up the hair shaft.
Step #4: Repeat Steps #2-3 on the other side of the head.
Step #5: Take one of your face-framing layers and pick up a piece of hair underneath. Pinch the two pieces of hair together and elevate slightly. Use the back cutting technique with your Slide Cutting Shears to soften the line and blend the hair together. Continue this process with the remaining layers, working from front to back, then repeat on the opposite side.
Beveling the Back

For the back layers, follow the head-shape by working in narrow pie-shaped sections. Maintaining a consistent 45 degree cutting angle throughout the haircut creates a beautiful rounded shape with lots of soft volume.
Step #1: Secure the face-framing layers out of the way with Dry Sectioning Clips. Divide the hair into two vertical sections along the centerline.
Then divide each vertical section into two pie-shaped vertical subsections or “bevels”. Leave one of the center subsections loose, and secure the other bevels with clips.
Step #2: Pick up a small section from the top of the bevel (the one that is closest to the center and is not secured with a clip). Then pick up a small piece of hair from the face frame to use as a guide.
Elevate both pieces to a 45 degree angle, place your fingers into the hair and slide out just past the length of the guide.
Step #3: Slide cut the bevel by opening and closing your shear as you glide your fingers up the hair shaft, cutting short to long.
Step #4: Repeat Steps #2-3 with the remaining three bevels.
Step #5: If desired, connect the back layers with the perimeter using your Slide Cutting Shears in an open-and-close “chewing” motion.
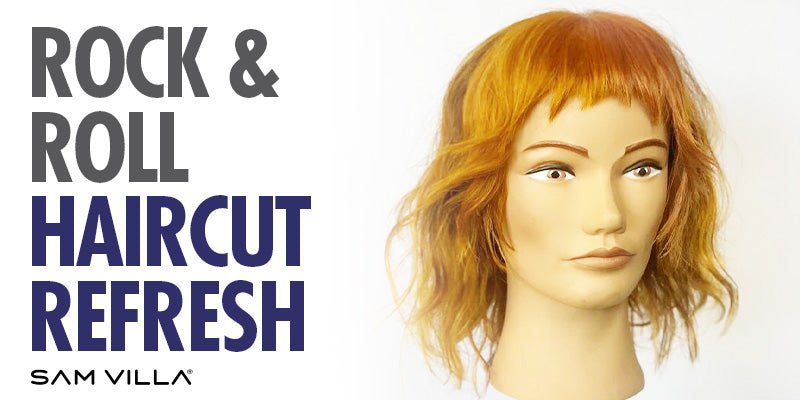
Finishing and Styling the Shag

Trim the perimeter after completing the fringe and layers. If needed, finish the shag cut by removing excess weight and softening any hard lines with the InvisiBlend Shear.
The magic of this cut is that it looks amazing with minimal styling input. Consider applying product to define the layers and then molding the hair with your hands!
Finding a New Approach
For many of us, when we approach a shag haircut we automatically think “razor”. While the razor is a powerful texturing tool, it may not be right for every situation or every guest.
If a guest is razor-shy, or if preserving weight and density is the primary concern, we can add value by offering the same textured effect with a shear instead of a razor.
While shag cuts can look technical and intimidating, Becka’s step-by-step process makes it easy. It’s all about designing the haircut with purpose and intention, while learning new ways to achieve the same results. Try this stunning shear-cut shag on your mannequin and let us know how it goes!