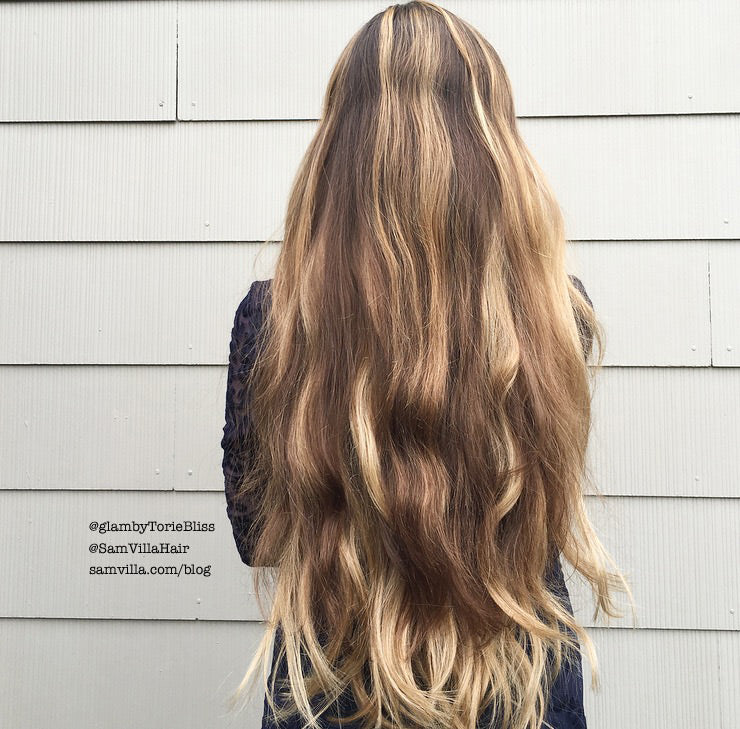
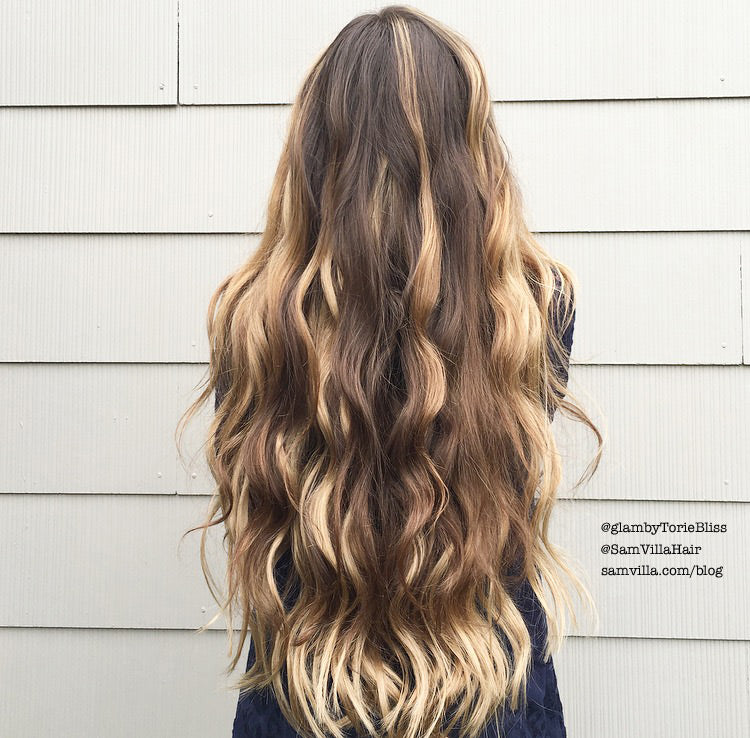
Soft effortless bohemian hair is all the rave right now and if there is a braid involved it is icing on the cake! Who doesn't love combining braids and boho waves?? They are the perfect combo, like peanut butter and jelly. This style can be worn for any occasion – at a wedding, prom, festival, work, the grocery store...seriously though, anywhere! Follow the simple steps below to recreate this half up boho braided hairstyle!
How To Create a Bohemian Braided Hairstyle
Step 1: Add Extensions for Length
To begin this braided hairstyle I clipped in my 24in extensions. I use blonde ones to give my hair more dimension so my braids pop! They also give me tons of thickness and 4 inches extra length. I prefer my hair to be washed the night before so it isn't to silky, I'm all about texture! If you or your client's hair is freshly washed you can rough it up with the Sam Villa Textur Iron or some dry texture spray. I love using the texturizing iron because not only does it add texture to your hair, but it also increases the volume so your braids are fatter!
Step 2: Curl Your Hair
Once I added my clip in extensions I created some soft waves using a 1 inch extra long curling wand to give it that boho look. I also love using my flat iron to create quick waves that look natural and last all day.
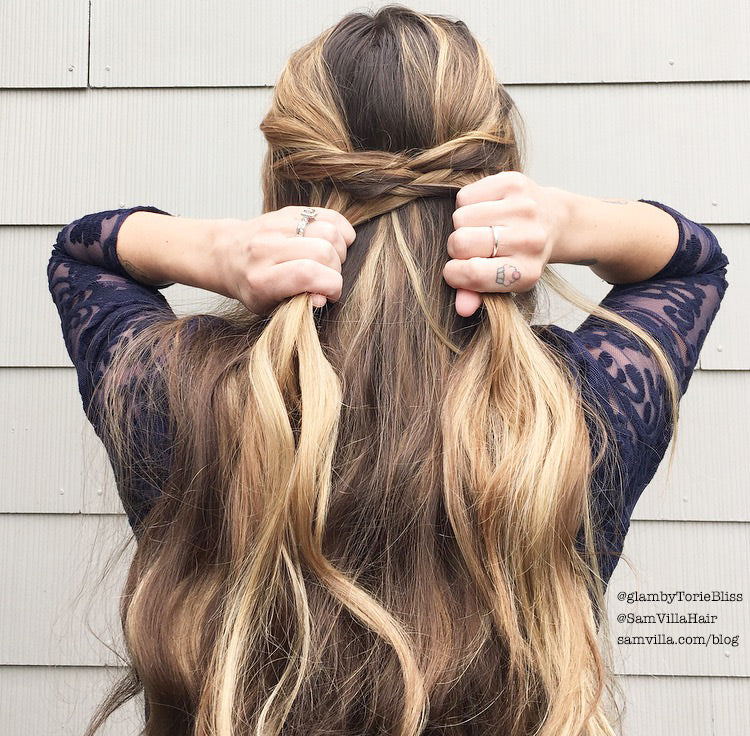
Step 3: Section Your Hair

Next, take two sections on either side of your head. I like to use diagonal/triangle shaped sections. (Diagonal partings help the hair to fall softer when pulling it back). When you take these two sections be sure to leave the entire middle of your hair down.
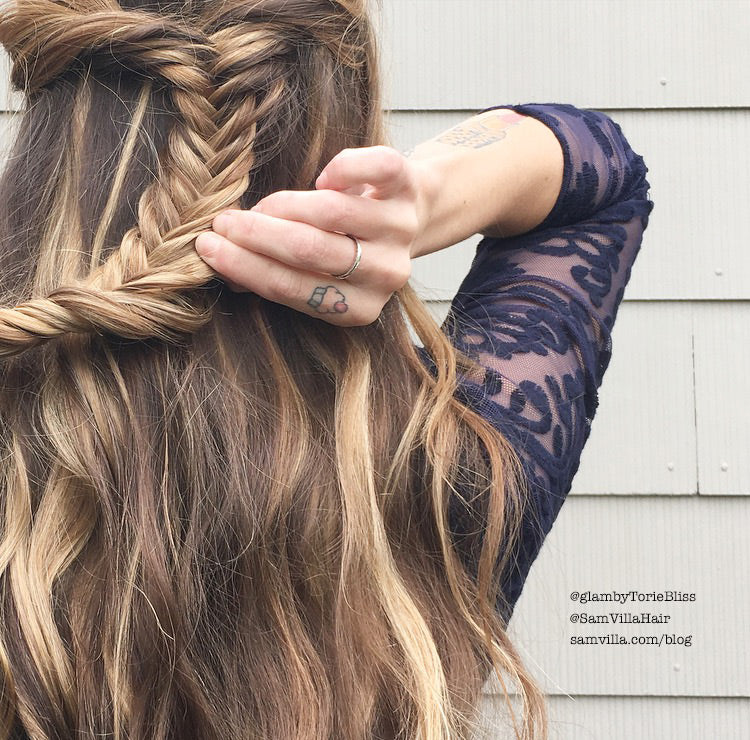
Step 4: Create a Fishtail Braid

Create a fishtail braid by taking small pieces from the outer point of each section and crossing them over to the middle to the other section. I recommend beginning the fishtail braid with the highest/outer pieces of your hair, doing this brings your fishtail up higher and creates more detail in the sides. Also, if you have short layers it helps to keep them more secure.
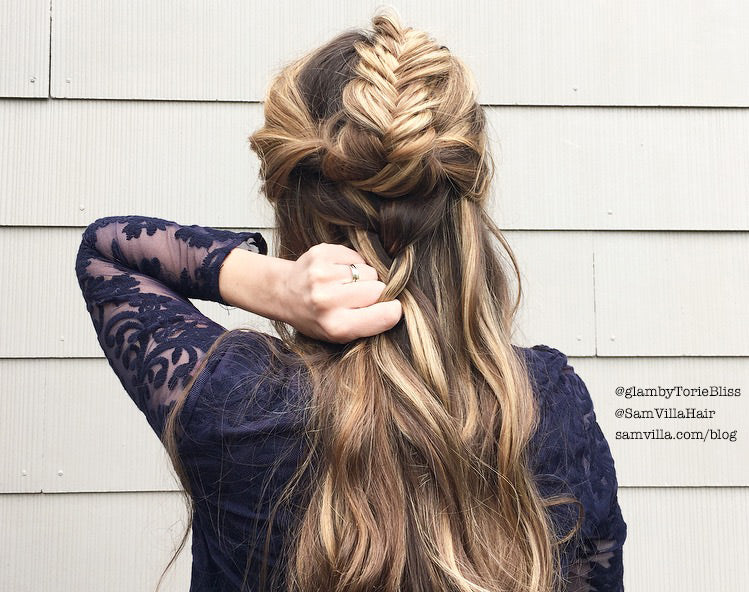
Step 5: Pancake Your Fishtail Braid

Once you have finished your fishtail braid pancake that baby out. This means you are going to pinch and pull each individual section of the fishtail to make it full and airy. I love to use a dry texture spray to give it more grit.
HOT TIP: Don't get to wild with pulling the braid apart in this step because the bottom braid will be the braid you want to be the fullest and most dramatic! In my example, I pulled at my sides a bit too to give it a more tousled feel.
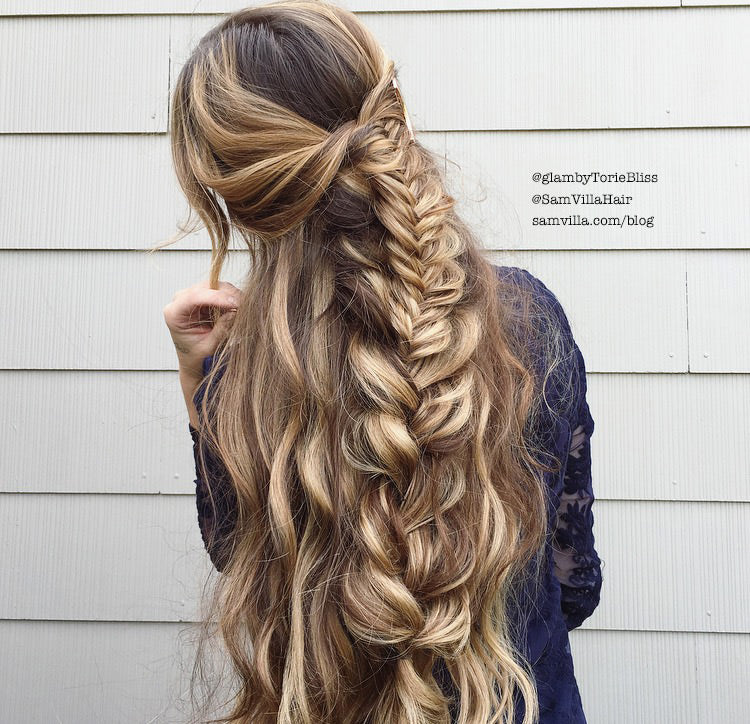
Step 6: Create a 3 Strand Braid

Now, clip that fishtail braid out of the way (or you could just wear it like that because it does look pretty fabulous, right ?) then gather the underneath section of hair. I like to take a horseshoe shaped section as it gives you a lot more hair to work with. Next, create a regular 3 strand braid all the way down to the end then secure with an elastic.
Step 7: Pancake Your Braid Some More

This is where we take pancaking your braid real serious. Pull that braid apart as much as you can to make it super dramatic. In the pictures above, my braid was pretty much completely flat but you can not tell, it just looks crazy thick!
HOT TIP: Work your way up and down the braid, first on one side and then on the other, pulling a little at a time until you get to the desired thickness. This helps keep the braid together and neater. If your try to achieve your desired looked to quickly your braid will become a little to disheveled or you won't get the braid to pull apart as you would like.
Step 8: Combine Your Fishtail Braid & 3 Strand Braid

Now it is time to unclip your fishtail braid. About half way down your 3 strand braid, part open a section and weave your fishtail braid through it from the top to the underneath. Now that the tail end of the fishtail braid is behind the braid, you can pin it into place. I gently weave bobby pins, using a sewing motion, through the fishtail braid and backside of the 3 strand braid to combine them together. Be sure not to poke the pins through to the top.
Step 9: Accessorize Your Braided Hairstyle
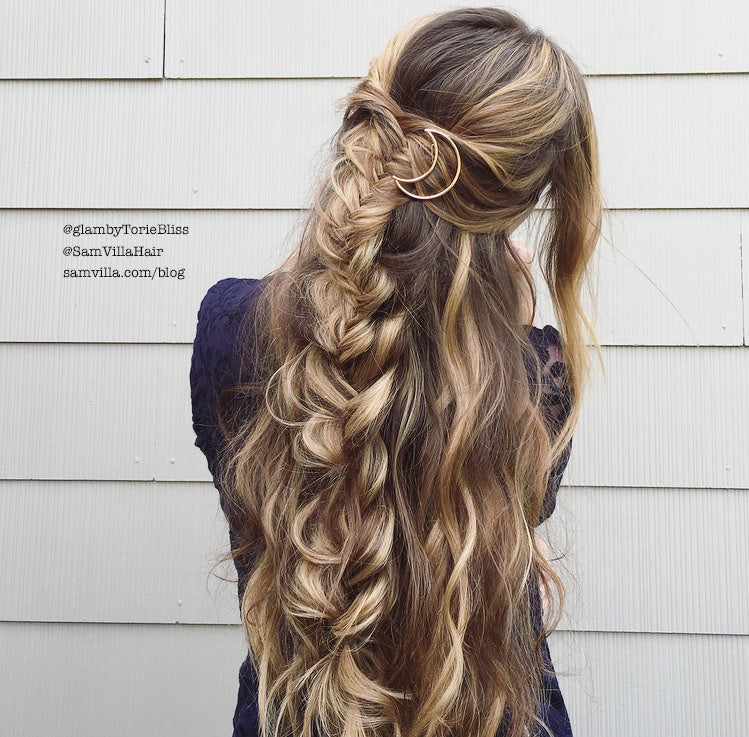
I topped this braided hairstyle off with my @rosyblondeofficial moon clip because I am a sucker for great hair accessories! They always add just enough charm to amp up an already awesome hairstyle! Accessories only make a hairstyle look better, right?
Final Step: Recreate & Share Your Pics With Us
We encourage you to recreate this boho braided hairstyle and when you do be sure to tag #glambytoriebliss and #samvilla so we can see your creations!
I hope you enjoyed this braid tutorial and learned something new! Check out my other stacked combo braid tutorial that I shared not long ago. Stay inspired!
- Torie Bliss - @glambyTorieBliss